Containers – Making an alpine trough

Today I planted up an alpine trough. I used a round shallow terracotta pot. I had the plants, compost and pot ready to go. It took me around half an hour to complete.
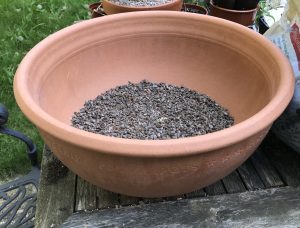
First fill the bottom of the pot with grit, to about 2cm depth (or a bit less for a shallower pot). This will help water drain through the pot. Alpines, cacti and succulents do not like to sit in wet compost.
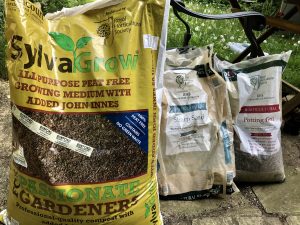
Prepare a suitable mix for your plants. Cacti, succulents and alpines will like a mixture with a lot of sand and grit in it. Again, this is so that water drains through the pots easily and they do not sit wet. They also need fewer nutrients in the soil than most other plants, so do not need to be in a rich, pure compost. I used a mixture in equal parts of peat free compost, sharp sand and potting grit.
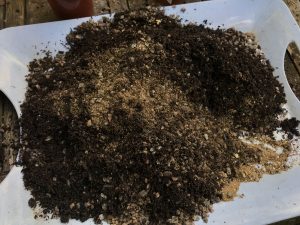
Mix the different parts well, so that you can’t see separate streaks of sand and grit in the compost.
Alternatively you can buy a pre-mixed compost. Gram for gram, it will be more expensive, but if you are only making one pot, this may work out cheaper than buying three bags of different products. Also, you may not have room to store part-used bags of compost, sand and grit, so this can be a space saver.
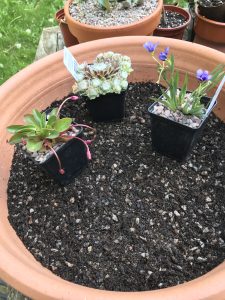
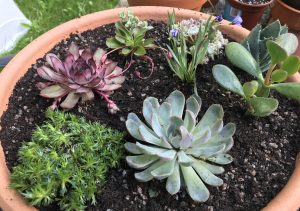
Add your compost mix until you can stand your chosen plants so that the top of their individual pots is around 1cm below the top of your big pot.
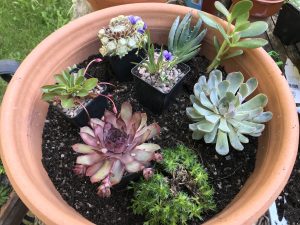
Before topping up any more compost, arrange your plants into their final positions. This gives you a chance to play with different textures and colours next to each other.
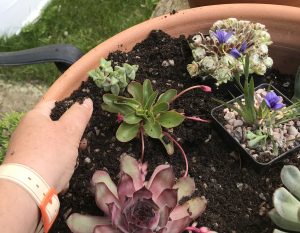
Gradually add the compost mix around the plants, removing them from their plastic pots as you go. It’s easier to add by hand when adding small quantities. Try not to get compost over the top of the plants as this can get stuck between their fleshy leaves and make them rot.
If a plant is slightly out of place, you don’t need to start all over again. You can gently push its root ball into position (pinch it under the soil, don’t pull the plant by its leaves). You can also tilt or raise plants and build a little more compost around them to get the position right.
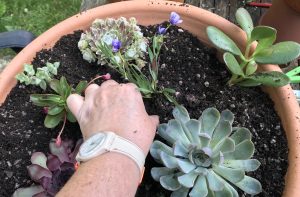
When everything is planted, make sure the compost is even around all the plants – by gently pushing on the soil and evening it out around the edges of the pot.

Cover the surface with grit. It is easier to do this using a small flower pot or jug. This will help you get an even coverage, and avoid covering the leaves and tops of the plants with the grit. The grit will create a visual effect to make the plants “pop” more, but will also stop the plants from resting on damp compost, which could cause them to rot.
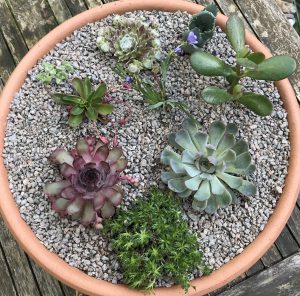
Once finished, water throughly. This pot looks slightly sparse at the moment but the plants will grow relatively quickly in the next few months, or produce offsets (new plants on side shoots) so it will fill out. It is not a good idea to plant these kind of plants too close together as, again, this can cause a wetter atmosphere than they like.
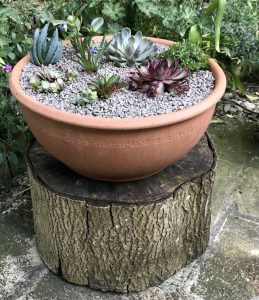
These kind of displays are best looked at from above (or possibly on a level), because the plants are small and have a lot of detail to inspect and enjoy. I have placed this one on a log stump on the patio. Be aware when moving it that the pot will be heavier than it looks, as it contains a large amount of sand and grit, which is heavier than just compost.
Aftercare: Water regularly, but not too often. You need to wait until the compost dries out between watering. This could be once a week in dry, hot weather but less in cooler or wet conditions. Many common alpines and succulents (like Sempervivums/houseleeks) will survive outside in winter. In an ideal world, an alpine pot could be brought into an unheated greenhouse (or similar space where it is dry and light) over winter – as it is not the cold, but the wet which will affect these plants. It’s worth noting that I have used a few tender succulents in this display pot, so they will have to be removed from the pot and brought in to a warmer space over winter.